Jump to content


Photo

can some one have a look at this (sorry it so big )

xboot

  • Please log in to reply
10 replies to this topic

#1 hoptop

hoptop
  • Members
  • 9 posts
  •  
    United Kingdom

Posted 04 March 2013 - 10:21 AM

hi I am making a small boot stick and need so help making it look and work a bit better like is the a way of get the slash image to a higher res  i have seen people have done it but can not find out how also is the any code i need to change to make it work better menu here part of the code 


menu


clear
debug off
 
## menu border color
color border=0
 
echo -P:0017 $[0026]LOADING PLEASE WAIT
pause --wait=1
write (md)0x220+1 !BAT\necho -n -P:0000 $[0133]                      --- THIS USB STICK WAS MADE BY STAPHEN JAMES ---                                     \0
initscript (md)0x220+1
 
 
# Splash Image
splashimage=(hd0,0)/pic/5.xpm.gz
foreground=000000 
background=000000 
## set vbe mode
graphicsmode -1 100:1000 100:10000 24:32
password --md5 $1$ removed
 
 
title You Must enter my Password  to get pc tool and insatallation 
lock
configfile /mainmenu.lst


main menu


clear
debug off
 
## menu border color
color border=0
## set vbe mode
graphicsmode -1 100:1000 100:10000 24:32 
write (md)0x220+1 !BAT\necho -n -P:0000 $[0133]              --- THIS USB STICK WAS MADE BY STEPHEN JAMES ---                                     \0
initscript (md)0x220+1
 
# Splash Image
splashimage=(hd0,0)/pic/2.xpm.gz
foreground=000000 
background=000000 
### MENU 
title Antivirus
configfile /boot/grub4dos/antivirus.lst
### MENU END
### MENU
title Recovery
configfile /boot/grub4dos/Recovery.lst
### MENU END
### MENU 
title ³ Boot from Hard Drive - Windows XP 
find --set-root --ignore-floppies --ignore-cd /ntldr
map () (hd0)
map (hd0) ()
map --rehook
find --set-root --ignore-floppies --ignore-cd /ntldr
chainloader /ntldr
### MENU END
### MENU 
title ³ Boot from Hard Drive - Windows Vista/7
find --set-root --ignore-floppies --ignore-cd /bootmgr
map () (hd0)
map (hd0) ()
map --rehook
find --set-root --ignore-floppies --ignore-cd /bootmgr
chainloader /bootmgr
### MENU END
### MENU 
title reboot 
reboot
### MENU END
one of the sub 
clear
debug off
 
## menu border color
color border=0
## set vbe mode
graphicsmode -1 100:1000 100:10000 24:32 
write (md)0x220+1 !BAT\necho -n -P:0000 $[0133]              --- THIS USB STICK WAS MADE BY STEPHEN JAMES ---                                     \0
initscript (md)0x220+1
 
# Splash Image
splashimage=(hd0,0)/pic/2.xpm.gz
foreground=000000 
background=000000 
### MENU 
title Back to  main menu 
configfile /mainmenu.lst
### MENU END
 
 
### MENU START
title Clonezilla\nCLONEZILLA-LIVE-20130226-QUANTAL-I386.ISO  (130 MB)\n
ls /images/clonezillalivequantali386.iso || find --set-root /images/clonezillalivequantali386.iso
map --heads=0 --sectors-per-track=0 /images/clonezillalivequantali386.iso (0xff) || map --heads=0 --sectors-per-track=0 --mem /images/clonezillalivequantali386.iso (0xff)
map --hook
chainloader (0xff)
### MENU END
 
 
### MENU START
title Darik's Boot And Nuke\nDBANI586.ISO  (10.5 MB)\nDarik's Boot and Nuke (DBAN) is a self-contained boot disk that securely\nwipes the hard disks of most computers. DBAN will automatically and\ncompletely delete the contents of any hard disk that it can detect, which\nmakes it an appropriate utility for bulk or emergency data destruction.
ls /images/dbani586.iso || find --set-root /images/dbani586.iso
map --heads=0 --sectors-per-track=0 /images/dbani586.iso (0xff) || map --heads=0 --sectors-per-track=0 --mem /images/dbani586.iso (0xff)
map --hook
chainloader (0xff)
### MENU END
 
### MENU START
title password remove\n
ls /images/pelazesoft.iso || find --set-root /images/pelazesoft.iso
map --heads=0 --sectors-per-track=0 /images/pelazesoft.iso (0xff) || map --heads=0 --sectors-per-track=0 --mem /images/pelazesoft.iso (0xff)
map --hook
chainloader (0xff)
### MENU END
 
 
### MENU START
title safetydrillrecoverycd\n
ls /images/safetydrillrecoverycd.iso || find --set-root /images/safetydrillrecoverycd.iso
map --heads=0 --sectors-per-track=0 /images/safetydrillrecoverycd.iso (0xff) || map --heads=0 --sectors-per-track=0 --mem /images/safetydrillrecoverycd.iso (0xff)
map --hook
chainloader (0xff)
### MENU END
 
### MENU START
title password remove\n
ls /images/pelazesoft.iso || find --set-root /images/pelazesoft.iso
map --heads=0 --sectors-per-track=0 /images/pelazesoft.iso (0xff) || map --heads=0 --sectors-per-track=0 --mem /images/pelazesoft.iso (0xff)
map --hook
chainloader (0xff)
### MENU END


#2 Wonko the Sane

Wonko the Sane

    The Finder

  • Advanced user
  • 16066 posts
  • Location:The Outside of the Asylum (gate is closed)
  •  
    Italy

Posted 04 March 2013 - 10:42 AM

I am not getting it.

This is probably a question that shoudl go in the grub4dos forum, but I miss the actual question.

Who are you?

  1. STAPHEN JAMES
  2. STEPHEN JAMES
  3. someone else :dubbio:

I mean ;), WHERE does that menu.lst originally come from?

It looks like a mish/mash of several different approaches put together with contrasting settings (for the graphical parts). :w00t: :ph34r:


See if this helps you :):

http://www.rmprepusb...plashimage-file


:cheers:

Wonko


#3 hoptop

hoptop
  • Members
  • 9 posts
  •  
    United Kingdom

Posted 04 March 2013 - 12:24 PM

no the spelling mistake was not it  it try to get the pic to work with higher res as when i try it the image do not come up and each part of the text above in different colour is different menu  this was made by xboot  by i try add bits to it 


#4 Wonko the Sane

Wonko the Sane

    The Finder

  • Advanced user
  • 16066 posts
  • Location:The Outside of the Asylum (gate is closed)
  •  
    Italy

Posted 04 March 2013 - 12:39 PM

no the spelling mistake was not it  it try to get the pic to work with higher res as when i try it the image do not come up and each part of the text above in different colour is different menu  this was made by xboot  by i try add bits to it 

Sure :), but the issue is then "outside" XBOOT, and related to grub4dos ONLY.

Check also the grub4dos version you are using, XBOOT, due to a tragical event :( that we only got to know recently:
http://reboot.pro/to...riam-of-shamur/
has not been updated since 2011.


Get latest "featured" version of grub4dos here:
http://code.google.c.../downloads/list

Then follow the instructions in the given link on Steve6375's RMPREPUSB site.


More generally, consider that it makes sense to use an automated tool such as XBOOT ONLY if you are satisfied with the result "as is" (or you want to make very minor changes to it), if you need to fiddle with it, you need to learn about grub4dos syntax and you will soon find out how it is actually easier (once you know how to use the grub4dos) to start from scratch and build manually your USB sticks.

:cheers:
Wonko


#5 hoptop

hoptop
  • Members
  • 9 posts
  •  
    United Kingdom

Posted 08 March 2013 - 11:36 AM

hi have been try to get the splash image to work with higher colours and higher  i have tried updating the grub4dos to grub4dos-0.4.6a-2013-03-03 but still can not get it to work right here the image the first  one is the how it booting and the how it should be Windows7-2013-03-08-11-20-10_zpse52c98b1

2-Copy_zpsd3f08477.jpeg


here my coding any ideal what i am going wrong 


clear
debug off
 
# set 1024x768 and load background (don't display 'Loading splashimage...' text by redirecting to nul
# set colours
color normal=0x66 highlight=0xe6 helptext=0x1D heading=0x0A standard=0x0b border=0x01
 
 
# wordspacing and linespacing normally set to 0, borderwidth=0 for no border, 1 for thin border, etc.
# /menusetting u    will restore max menu grub4dos default
set wdspace=0
set lnspace=0
set topstart=10
set rstart=80
set noitems=10
set menuw=90
set bdwidth=0
set tophelp=23
/menusetting.gz u
# place a 10 entry menu at extreme right of 1024x768 splashimage bitmap, starting 10 lines down
/menusetting.gz   %wdspace% %lnspace% %bdwidth% %tophelp% %noitems% %topstart% %menuw% %rstart%
 
echo -P:0017 $[0026]LOADING PLEASE WAIT
pause --wait=1
write (md)0x220+1 !BAT\necho -n -P:0000 $[0133]                      --- THIS USB STICK WAS MADE BY STEPHEN JAMES ---                                     \0
initscript (md)0x220+1
graphicsmode -1 100:1000 100:10000 24:32  && splashimage /pic/t.xpm.gz > nul
 
# Splash Image
 
 
password --md5 $1  removed 
 
title You Must enter my Password  to get pc tool and installation 
lock
configfile /mainmenu.lst
 
 
title ****** If you do not have password  ******\n
root()
 
 
### MENU END
title Boot from Hard Drive - Windows XP
find --set-root --ignore-floppies --ignore-cd /ntldr
map () (hd0)
map (hd0) ()
map --rehook
find --set-root --ignore-floppies --ignore-cd /ntldr
chainloader /ntldr
### MENU END
 
### MENU END
title Boot from Hard Drive - Windows Vista/7
find --set-root --ignore-floppies --ignore-cd /bootmgr
map () (hd0)
map (hd0) ()
map --rehook
find --set-root --ignore-floppies --ignore-cd /bootmgr
chainloader /bootmgr
### MENU END
 
### MENU END
title reboot 
reboot
### MENU END


#6 Wonko the Sane

Wonko the Sane

    The Finder

  • Advanced user
  • 16066 posts
  • Location:The Outside of the Asylum (gate is closed)
  •  
    Italy

Posted 08 March 2013 - 01:06 PM

WHAT are the features of the image?

(Size/resolution/number of colours/bit depth)

This:


graphicsmode -1 100:1000 100:10000 24:32 && splashimage /pic/t.xpm.gz > nul


is NOT among the given examples, and "auto-checking" the resolution may cause anyway an issue.


If the image is a 1024x768xn colours/bits, try the corresponding "fixed" setting.


check the reference page starting from here:


It is important to realise that not all systems can support high resolutions or colour bit densities. For instance, most older netbooks are 800x600 and so would not correctly support 1024x768. For this reason, if you want your bootable USB drive to work on a variety of systems, you will need to either use the lowest common denominator (e.g. 800x600) or check what graphics mode is supported and have a variety of different bitmaps of different resolutions available (see below for more about how to do this).

You may need to use VBEPROBE and a set of images with different resolutions.


:cheers:

Wonko


#7 hoptop

hoptop
  • Members
  • 9 posts
  •  
    United Kingdom

Posted 09 March 2013 - 02:04 PM

:book:


just to let you know that worked it out  i tried resize convert using image magick with no luck then tried fix size code 


graphicsmode -1 640  100:1000 24:32 
graphicsmode -1 800  100:1000 24:32 
graphicsmode -1 1024 100:1000 2432
this did not work  :lamo: 
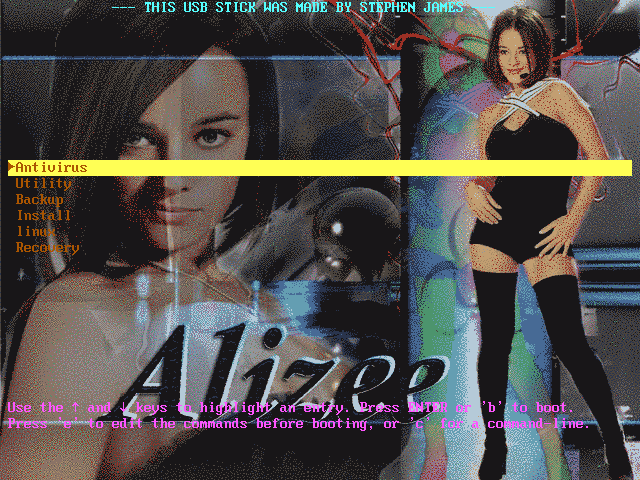
then I tried in paint and still zip them as .gz stall the same :chair: and was just about to give up the just tried just the unziip bmp image and it worked  
:good:
thanks to all that tried to help me 

Edited by hoptop, 09 March 2013 - 02:05 PM.


#8 steve6375

steve6375

    Platinum Member

  • Developer
  • 7566 posts
  • Location:UK
  • Interests:computers, programming (masm,vb6,C,vbs), photography,TV,films
  •  
    United Kingdom

Posted 09 March 2013 - 07:51 PM

You still haven't said what the bitmap resolution and color depth was?

Also, I notice your extension was  xxx.xpm.gz - this is incorrect for hi-res bitmaps - you just take the bmp and compress it to .gz with 7Zip (do not convert to xpm).


#9 hoptop

hoptop
  • Members
  • 9 posts
  •  
    United Kingdom

Posted 09 March 2013 - 08:21 PM

it was 800x600 at 24 bit but I tried a few resolution and color depths i did use xxx.xpm.gz and xxx.bmp.gz but the only way I could get it to work is to lave it unzip and I got it working up to 1024x740 at 32bit as long as I do not zip it

#10 steve6375

steve6375

    Platinum Member

  • Developer
  • 7566 posts
  • Location:UK
  • Interests:computers, programming (masm,vb6,C,vbs), photography,TV,films
  •  
    United Kingdom

Posted 09 March 2013 - 08:34 PM

I tested with grub4dos 0.4.5c and 0.4.6a using an 800x600x24 bmp  zipped using 7zip to /fred/xxx.bmp.gz - both work fine.

Is there something you are doing differently?


#11 hoptop

hoptop
  • Members
  • 9 posts
  •  
    United Kingdom

Posted 09 March 2013 - 09:38 PM

think I  am just going to lave it as it working  unzipped 


Also tagged with one or more of these keywords: xboot

1 user(s) are reading this topic

0 members, 1 guests, 0 anonymous users